Share This Article
If you’re planning to introduce new features or functionality to your community or have done so in the past, you may have been met with the pushback. Changes, whether they’re large or small, can often be difficult for communities as they become familiar with new functionality or a new experience. During our experience working directly with and managing communities we’ve found that the best way to ease this process is with open communication and community involvement, which is why we think that beta testing is critical for mitigating toxicity and successfully making changes to your site. Below, you’ll find our strategy on how to run a beta test and the benefits it’ll provide your community during the site update process and after you’ve made changes.
The benefits of beta testing
Beta testing can help community members feel directly involved in the betterment of the community. When new changes are introduced to your site, having active users test allows them to become advocates for those changes and as well as becoming familiar with the new functionality before the updates have been made.
It’s beneficial to have people using the site everyday to test out functionality. The development process can at times be lengthy, so having a fresh set of eyes can ensure that everything is streamlined and clear for users. You will also need to consider the type of functionality you’re adding as your goals for the community may be different from the goals of your users. The functionality needs to work well for both returning users and new members, making sure that functionality is straightforward with the health of the community in mind.
How to run a beta test
Below we’ll lay out our process for beta testing, everything from the documents you’ll need, how to identify your team, and the process of running a beta test.
What documents you will need
Before starting to beta test, you’ll need to do initial planning by creating a beta team application (This is a template form we send out and can be referenced). This application should be used to collect the user’s name, their username in the community, and their email. Once you’ve collected this information, you now have the ability to email them a Non-Disclosure Agreement. We recommend having an NDA in place because community members are viewing functionality or content that hasn’t been released yet, so this document ensures that no information about the update is released before the appropriate time.
Identifying the team
The primary purpose of beta testing is to become familiar with new features and resolve any bugs before the official launch. For this process, we recommend limiting the amount of beta testers you include on your team to Administrators, Moderators, and 20 active users. You can see how we identify active users here.
The beta testing process
Once you’ve collected applications, identified everyone on your team, and sent out NDAs you’re now ready to start beta testing. Below, we’ll lay out the process from planning your beta test to closing the test.

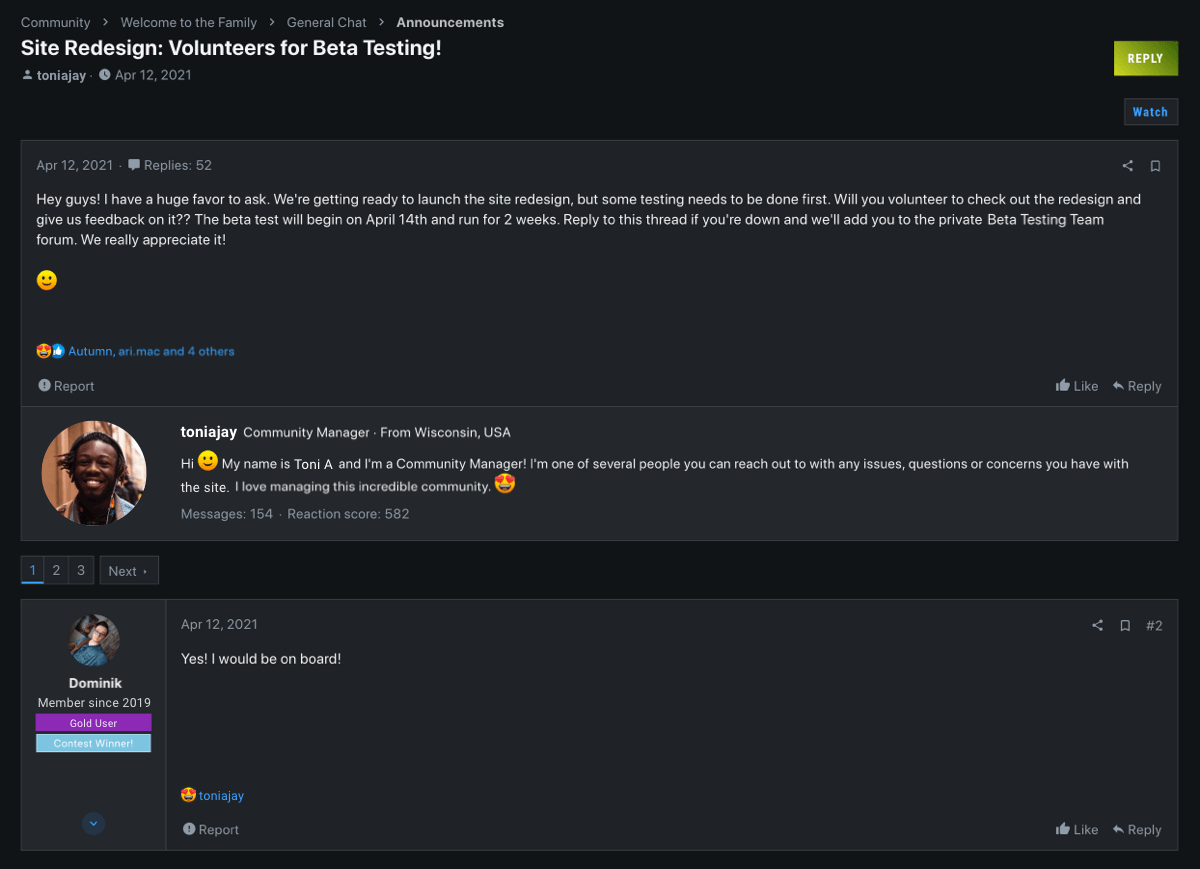
1. Announce the beta test and collect volunteers
- In this announcement, you will list the new changes coming and link your application to collect volunteer beta testers.
- We typically leave the application open for 1 week or until we’ve received 20 responses.
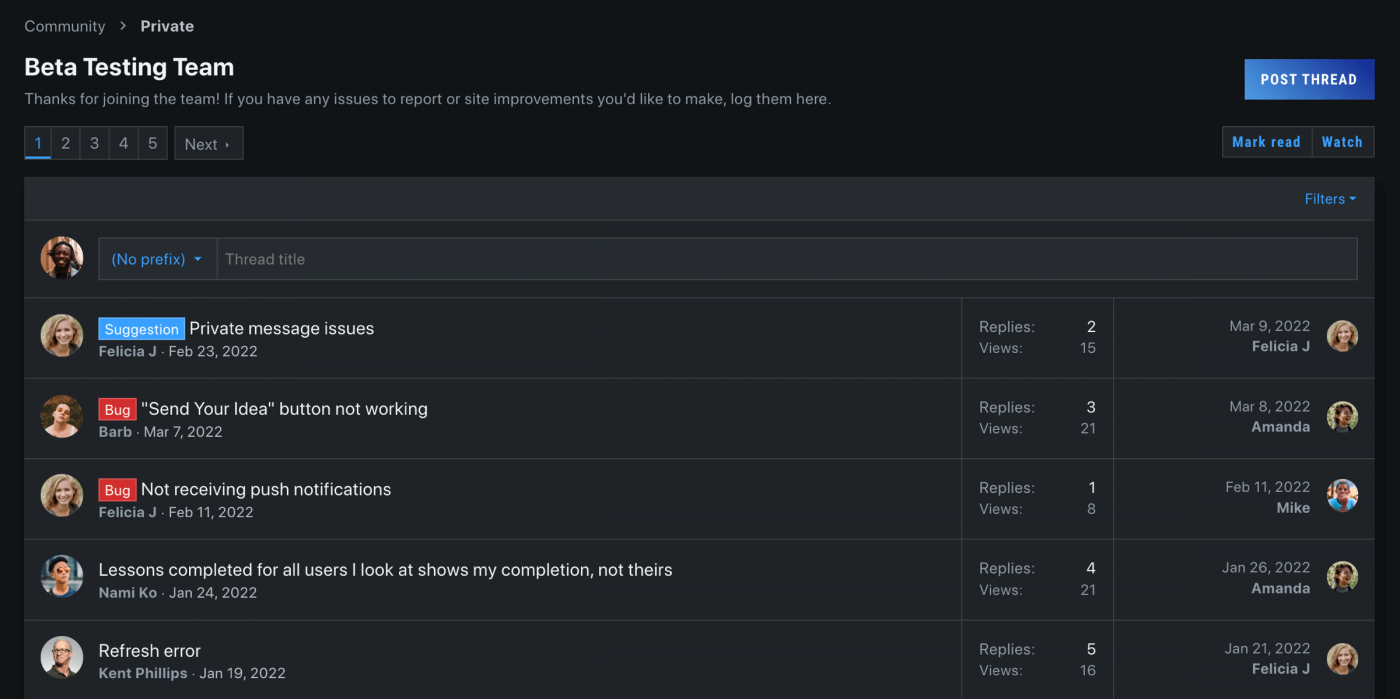
2. Create a private beta testing area
- This area will only be accessible to beta testers, Administrators, and Moderators.
- Create a user group for beta testers.
- Add prefixes to your area for beta test issue reporting, namely: Bug, Fixed, Confirmed, and Suggestion.
- As you collect volunteers for the beta team, send them the NDA. Only after the NDA is signed should you add them to the beta testing user group and give them access to the private area.

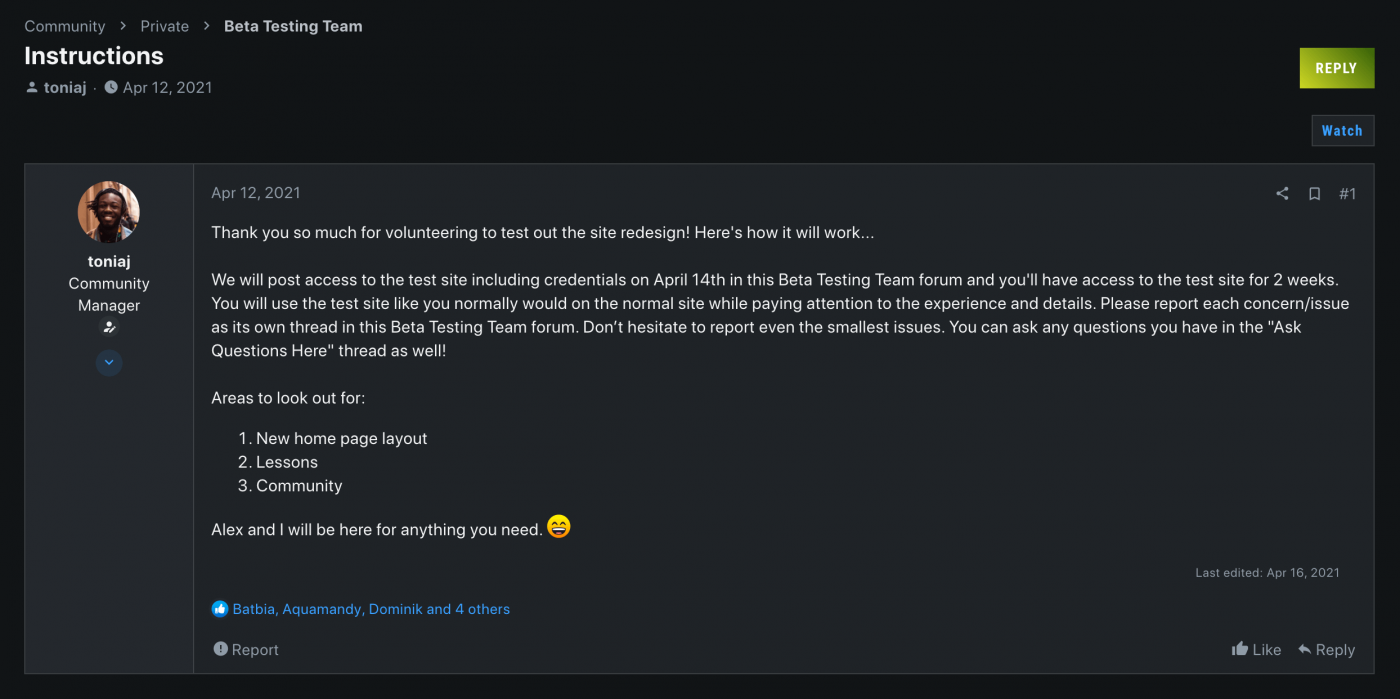
3. Give instructions for beta testing
- These instructions should be created in the private beta testing area.
- We recommend locking this thread so that users don’t attempt to begin submitting issues to this thread. We want individual threads for issues so that we can appropriately mark them with prefixes.

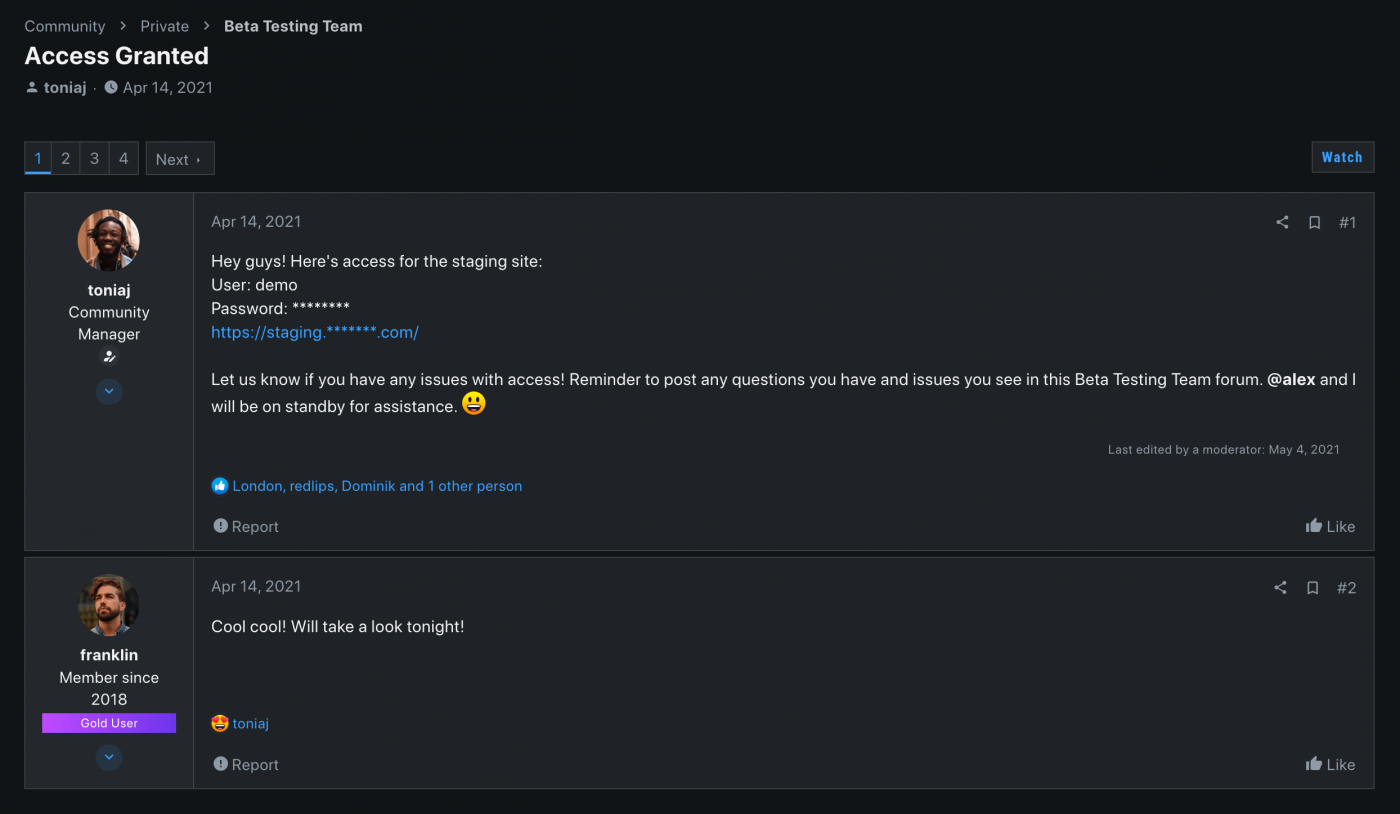
4. Open your testing site to your beta team
- Once the testing site is ready for beta team access, post the new features you’re showing the team. In the initial announcement you listed the new changes coming to the site, but here you can go into more detail as to all the functionality that needs testing.
- Provide any relevant login information to give them access to the testing site.
- We typically run beta tests for 2 weeks.

5. Beta testing is in progress
- While the testing site is open, continually monitor the private area and respond to any feedback from users.
- During the period, any bugs should be reported to your team and quickly fixed.
6. Ending the beta test
- After your users have been testing the new features for 2 weeks, close the testing site and remove beta tester access.
- Thank beta testers for reporting bugs and testing the new features in the private beta testing area.
How beta testing has worked in practice
We follow the process above, making adjustments as necessary to fit the site we’re working with as every community has a different user base and environment. As an example, we have worked with a community that required an updated theme, updated software, a streamlined user experience, and community management services to handle the beta testing process.
To have a successful beta testing process, we had several meetings with community leaders beforehand to confirm that all necessary features were included from their perspective and ran community surveys to make sure all requested features from community members were noted. Once we determined and applied all the features necessary for a successful launch to a testing environment, we posted an announcement to all community members about upcoming changes and to collect beta testing volunteers. From this point, we followed the process above completely to perform the beta test, collected any bug reports, and closed the testing site after 2 weeks.
From this process, we found a surge of positivity from the community. We ran into features that weren’t as popular or intuitive to use, but by working closely with community members, we made necessary changes or explained our thought process and were able to come to an agreement on the site setup.
Let’s wrap it up
At the end of the day, keeping an open dialogue with your user base is crucial for a successful launch and having a beta test is a great way to work out any bugs before launch while allowing your community members to become familiar with new features and identify anything that they don’t understand or is missing. This process can go a long way in reducing toxicity in your community when new changes are introduced because your beta testers will become advocates for the changes and ease the transition process by teaching other members.
There are many benefits to running a beta test and the steps outlined in this article can be mixed and matched depending on what’s best for you and your community.


